Did you see last week’s front yard makeover reveal post? It was jam-packed with before and after photos from the recent “Bleak to Chic” home makeover in Portland, Maine that I was so excited to be a part of with Lowe’s! So many details went into the project that I couldn’t possibly cover it all in one post, so here’s a more in-depth look at the first day of our two day makeover, starting with a brief video that gives you a glimpse of just how hard our incredible Lowe’s Heroes worked!

Our Lowe’s Heroes and homeowner Deanna at the end of Day 1
Here’s a look back at all our hardworking team was able to accomplish on the first day of Deanna’s front yard makeover, starting with the paver patio.
Note: This is a sponsored post written by me on behalf of Lowe’s. All opinions expressed are 100% my own.
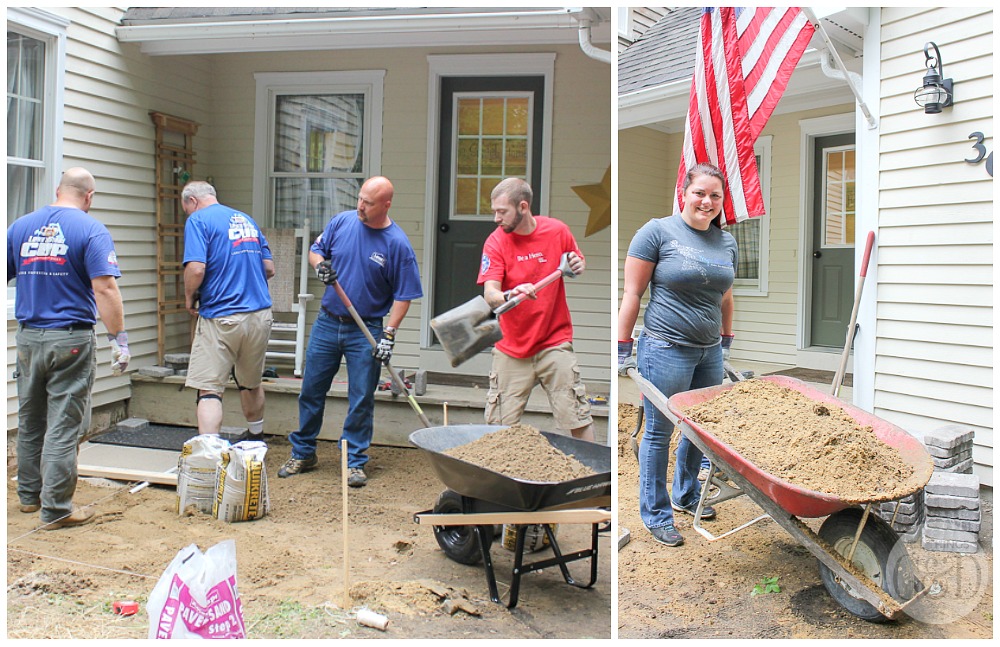
Clearing out the patio area.
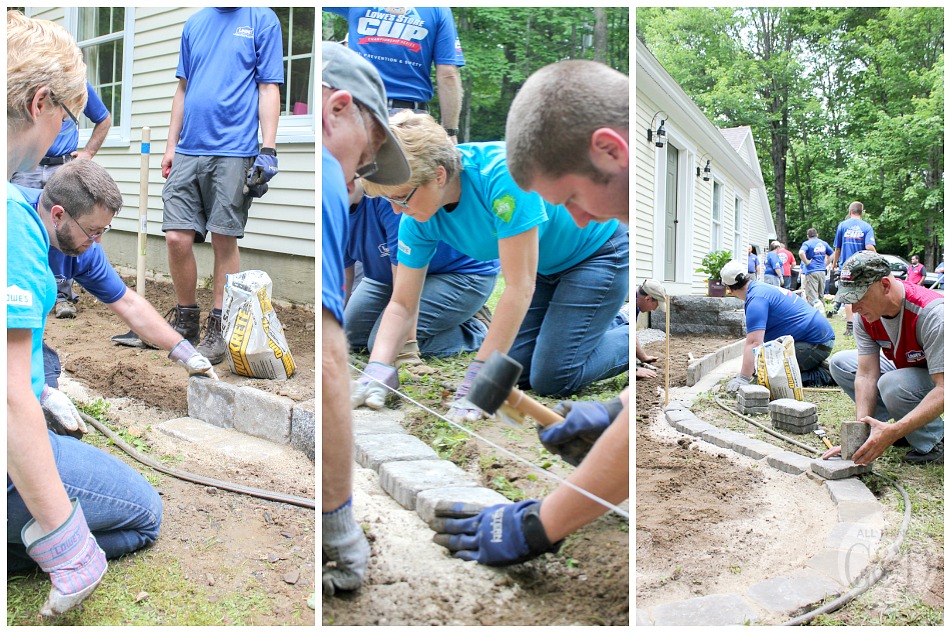
Our crew started by digging up the sparse grass and dirt in front of Deanna’s main entryway to her home to make room for a new paver patio. Once the area was sufficiently dug down and compacted, a layer of sand was added to level the surface.
One of our Lowe’s Heroes noticed that the step from the ground/future paver patio up to Deanna’s front porch was not up to code – it was too high. We remedied that with a last minute design change, bringing in a granite step that matched the steps at the front of Deanna’s house.
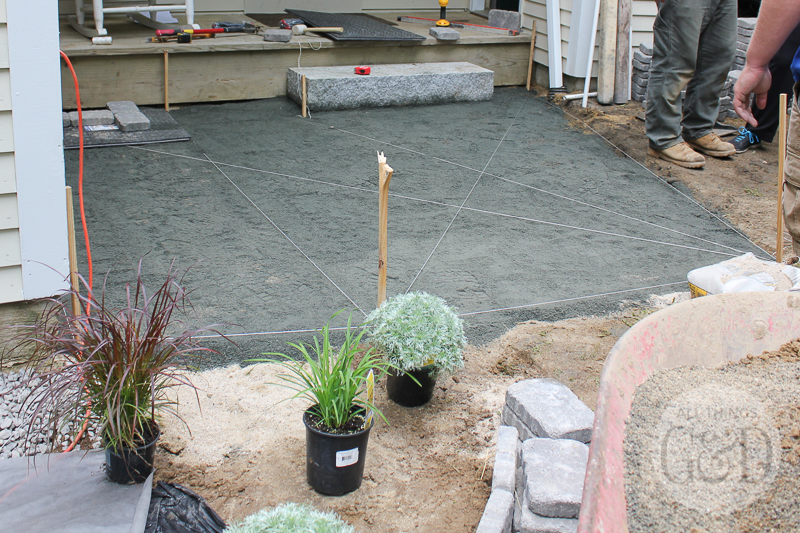
Patio area leveled and ready for paver base panels.
I mentioned in my Lowe’s Front Yard Makeover Reveal post that we used used Brock Interlocking Paver Base Panels from Lowe’s instead of traditional paver base sand. These panels create a stable platform for paver stones without the need for time consuming deep digging and heavy loads of paver base sand.

Installing paver base panels – an innovative alternative to loads of paver base sand.
With the paver base panels laid, it was time to add the pavers! Deanna selected the Allegheny Countryside Patio Stone from Lowe’s for her dream patio look. She was interested in a mix of square and rectangle pavers, and wanted the end result to look random so I chose the “I” pattern, which looks random but is actually quite simple to execute. It’s a series of interlocking I’s – can you see it?

Interlocking “I Pattern” for the paver patio design.
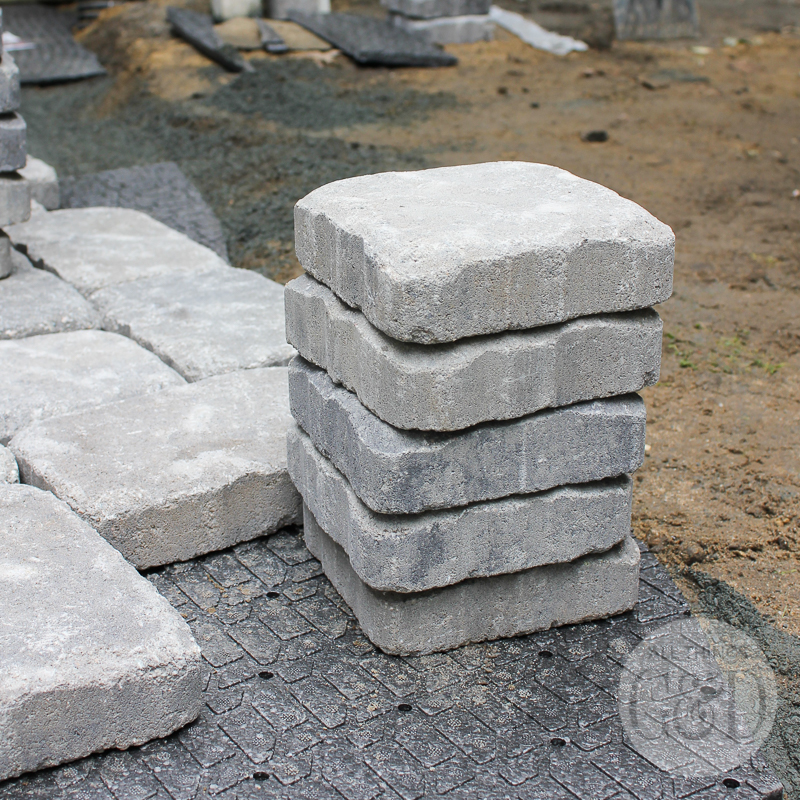
Allegheny Countryside Patio Stone from Lowe’s.
The two outer edges of the paver patio were outlined in 6×9” paver stones to give it a nice, finished look. Additional pavers were trimmed using a miter saw and fit into the remaining gaps.

With the pavers all in place, the final step was to fill in the joints with sand. We chose polymeric sand (tan color) which – once sprayed with with water – hardens to lock the the pavers together. The overall result is a strong, more durable paver patio that resists weeds and won’t track a mess of loose sand into Deanna’s house each time she walks across it.
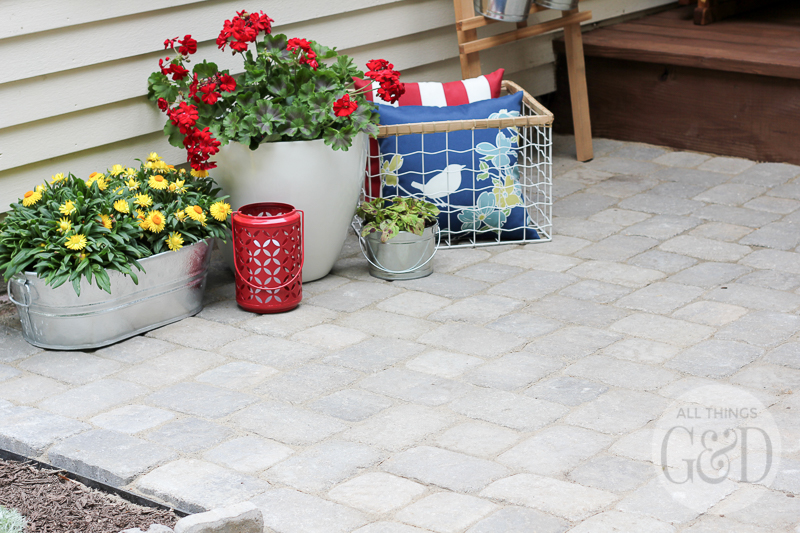
The finished result.

Paver Patio Resources
Interested in installing your own paver patio? Here are the resources I found most helpful for figuring out the items you’ll need, how much you’ll need to purchase, and step by step instructions:
Article: Installing a Patio or Walkway
Video: How to Install a Paver Patio
Information on how to adjust your patio plans using the paver base panels can be found here: Brock Paver Base System
Paver Patio Supplies
Allegheny Countryside Patio Stone – 6×9” Rectangle
Allegheny Countryside Patio Stone – 6×6” Square
Brock Interlocking Paver Base Panels
Leveling Paver Sand
Flexible Patio Stone & Paver Restraints
Plastic Paver Spikes
Polymeric Sand
Additional supplies as outlined at the top of this article under Tools & Materials.
While the paver patio was coming together, the front of Deanna’s home was also shaping up with new landscaping! Our Lowe’s Heroes were hard at work digging up grass and creating fresh beds for beautiful new flowering plants and bushes.

Deanna was hoping to keep her front yard as low-maintenance as possible, so we trimmed out her front flower beds with the same Allegheny Countryside Patio Stone rectangular pavers that we used for her patio entrance. Our Lowe’s Heroes buried one row of pavers into the ground, flush with the grass, so Deanna could mow right over them – no trimming needed!
Low maintenance paver landscape edging.
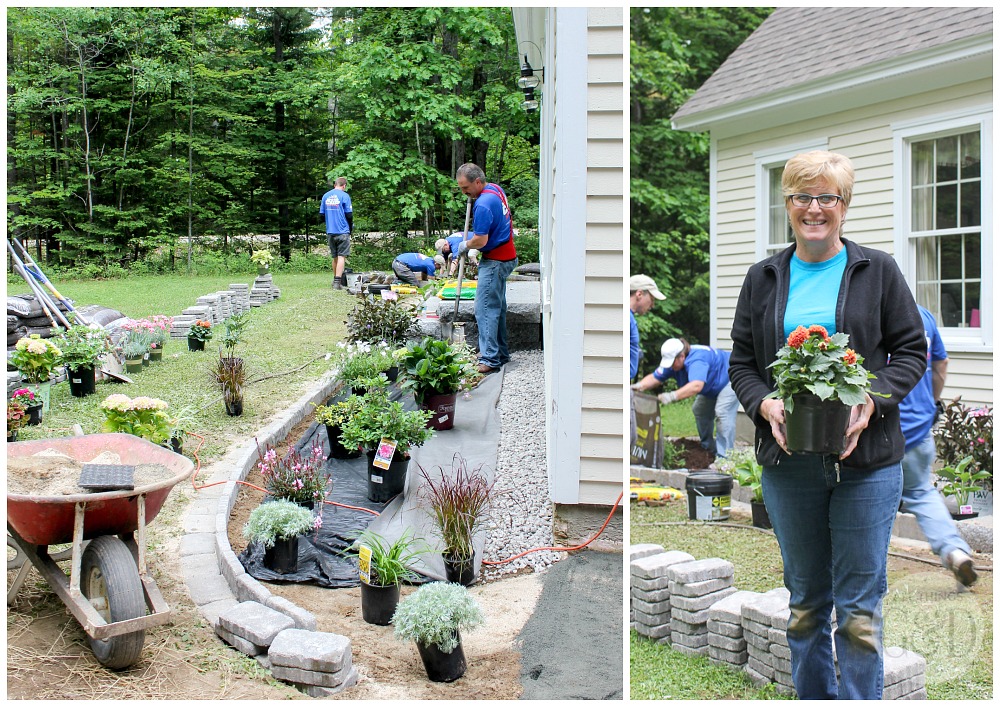

Homeowner Deanna and one of our handy Lowe’s Heroes, connecting the paver landscape edging to the new paver patio.
Last but not least, solar-powered accent lighting was added to the front flower beds to light up Deanna’s beautiful home at night.
The finished results:


Deanna’s Flower Bed Materials
Allegheny Countryside Patio Stone – 6×9” Rectangle
Leveling Paver Sand
Polymeric Sand
Landscape Fabric
Landscape Fabric Pins
Portfolio 3-Light Black LED Landscape Flood Light Kit
Drainage Rock
Mulch
Just when you think you’ve seen it all – there’s a whole other part of Deanna’s front yard our Lowe’s Heroes tackled! The very front of Deanna’s yard (where her yard meets the road) featured a beautiful rock wall which, sadly, was being hidden by loads of leaves and overgrown brush. Our Lowe’s Heroes cleaned it all up, added some fresh plants, and even re-stacked rock that had fallen through the years. The end result was curb appeal that matched the beauty of the rest of Deanna’s home.


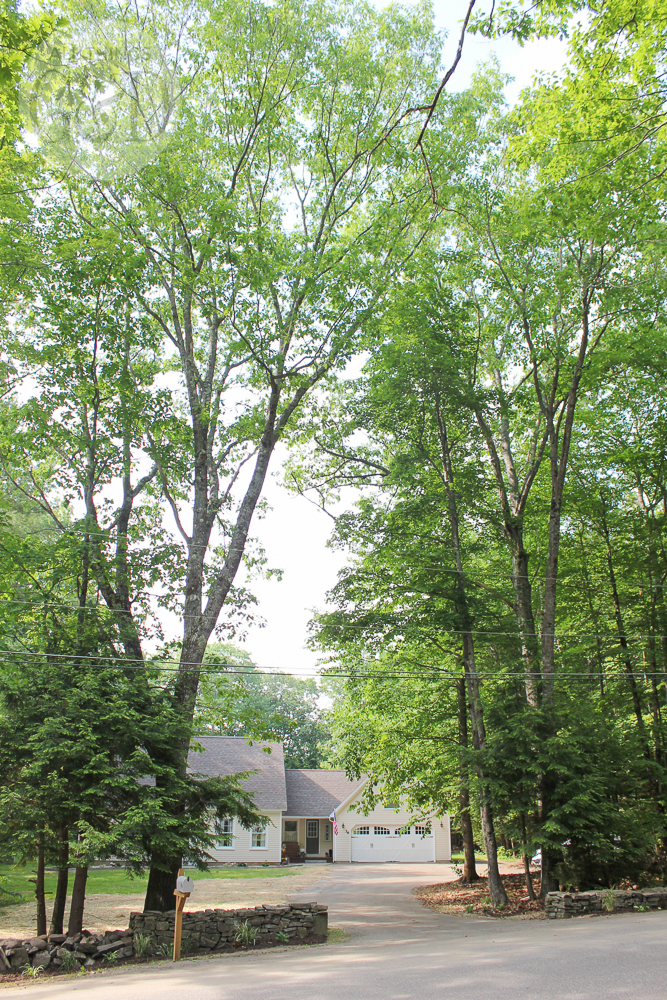
View of Deanna’s home from the road.
At the end of the day we showered our Lowe’s Heroes with thanks (and then sent them home to take actual showers) – but our day wasn’t over yet! Deanna and I hopped in her pickup truck and made our way to her local Lowe’s store in Portland, Maine to buy even more beautiful things to add the finishing touches to her front yard makeover on Day 2!

Buying all the beautiful things at Deanna’s local Lowe’s.
See the reveal of Deanna’s front yard makeover here: Lowe’s Front Yard Makeover | Portland, Maine
Leave a Reply