Looking for a cheap and easy way to update an old dresser?
Consider wall decals!
I fell in love with wall decals when I did Kate’s nursery, used them again for her 2nd birthday party, and now they can be seen adding color and character to the dresser in our guest room!

Our Guest Room
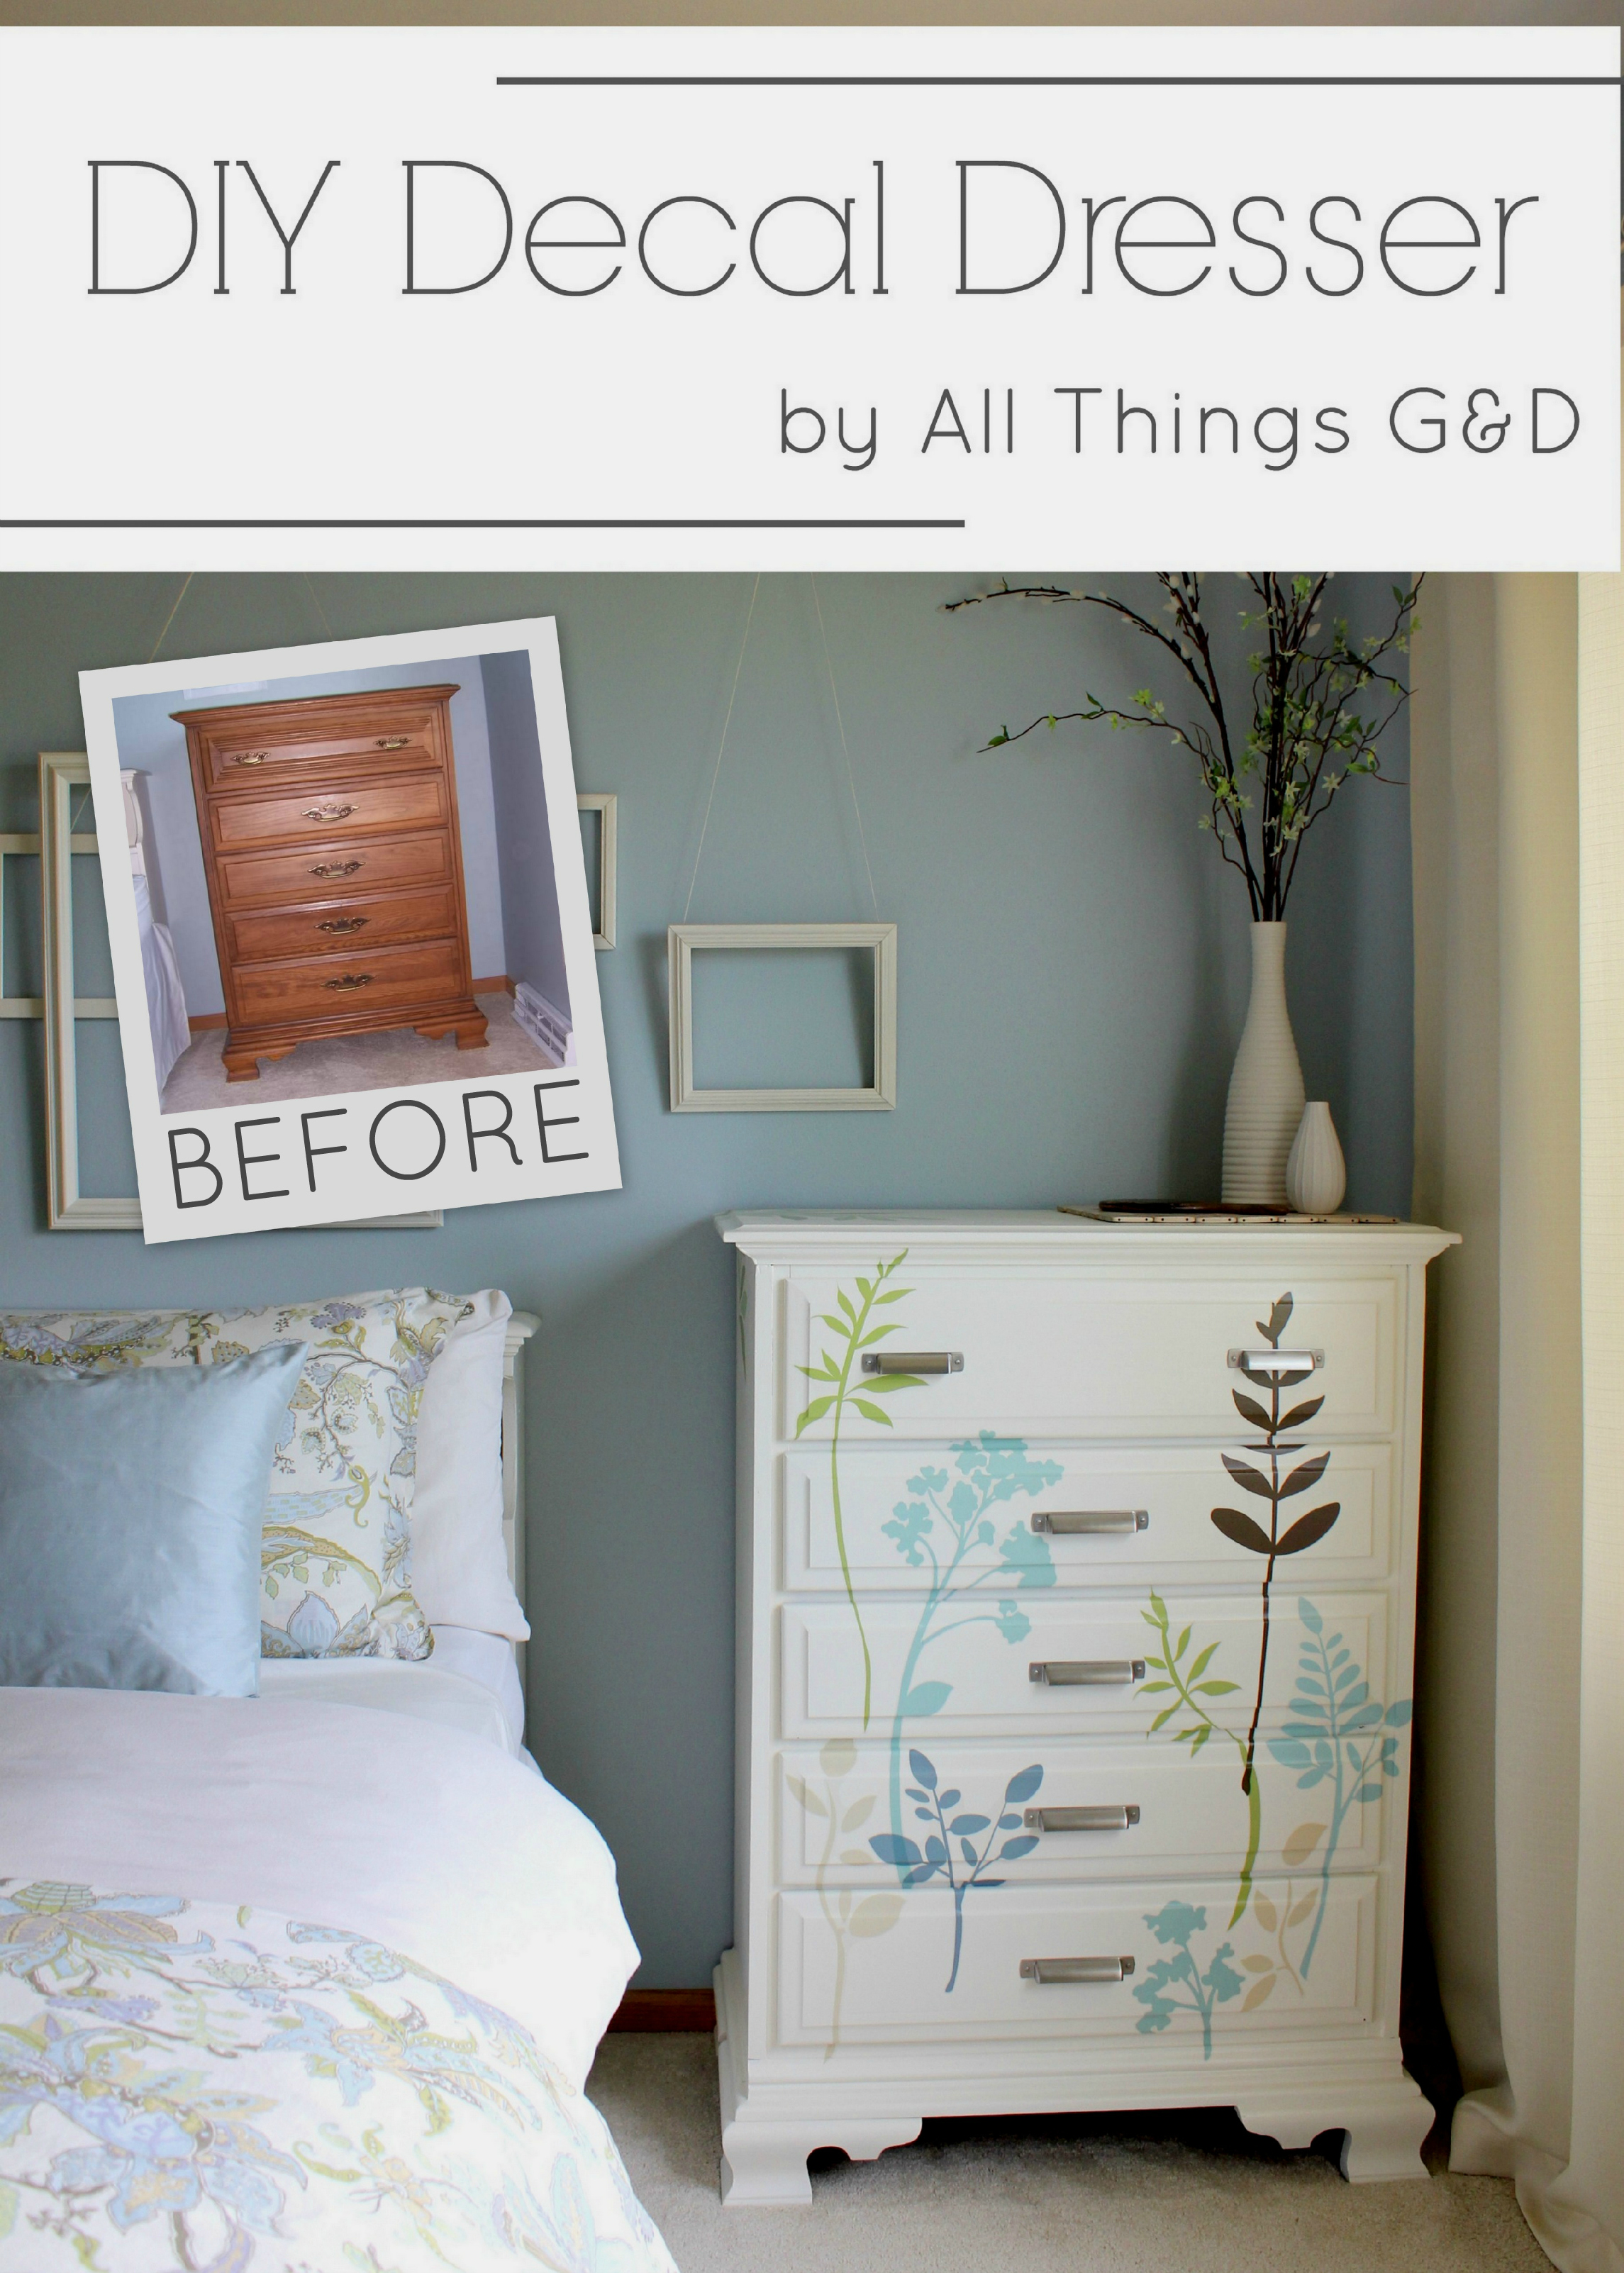
This dresser used to be G’s dad’s, and was given to us shortly after we moved into this house. It was in excellent shape (and some much needed storage!) but it needed a makeover to go with our guest room. I painted it white and added some new hardware and that’s how it sat in our guest room over the next few years. It looked great, but I always thought it needed a little something. With a white headboard, white sheets, white frames display, white curtains, and a white dresser, the room so damn white! I was going for “light and airy” when planning this space, but this was taking it to a Pearly Gates/Morgan Freeman voice-over kind of level, and that’s not exactly the experience I’d like our guest to have when they’re turning in for the night.
I considered switching out the curtains but didn’t want to spend the money, so the dresser became the target of my frustrations. My plan was to paint or stencil it, but I couldn’t figure out what kind of design I wanted on it, and frankly I wasn’t too motivated to decide because the whole process seemed like a a total PITA.
One day, while looking for light bulbs at Target, I noticed some wall decals and this leafy one caught my eye – all the same colors of our guest room bedding, and a complementary design without being too matchy-matchy. At only $15, I decided to give it a try!

I liked that they were adhesive, and after working with similar decals for Kate’s 2nd birthday party I knew they’d have great hold, but also be easily removable. The design I used can be found here, but there are tons of other decal options available!

DIY Decal Dresser

After doing the front of the dresser, I had some decals left over, so I decided to add a little decal to the top as well. I’m usually a “less is more” kinda gal, but I really like how the leafy accent on the top brings a little more green into the room and adds interest from different angles.


The whole process was really quite easy! First, I cut out each decal individually (keeping it’s backing on at this point) and taped them to the dresser to decide where I wanted each one placed. Then I peeled the decals off from their backing and starting from the top, applied them to the dresser. I worked top down, one decal at a time, using scissors to cut the decal once I came to the start or end of a drawer. (You don’t want to decal your drawers closed!) Once my cut was made I lined the remainder of the decal design up so it’d be in line with the piece I had just cut. My goal was that looking at the dresser straight-on you wouldn’t see a break in the decal design.

For only $15, it was a quick and low-cost way to add some color and interest to this corner of the room. And the best part? If I ever decide I want a different look, they’re easily removable without causing any damage to my dresser!


This post contains an affiliate link.
Holy Moly – that looks amazing! It goes perfectly with that bedding :):) You make it look so easy – I’m sure I would screw it up royally.
Hi Diane! And you should try it…I’m sure you could do it!
Thanks Diane! It was so easy to do – you should give it a try!
Oooh I love it D! Such a beautiful result! I have an almost identical dresser so now you’re giving me ideas…
Thanks MB! Good luck with your old dresser – we’ve all been there!
That’s really cool! Love it
Thank you, Charlene!
looooove
Thanks M!
What a great idea! love it!
Thanks Julie!
Looks so clean and fresh, now! Awesome job!
Thank you so much @EmbellishedLiving!
this came out so great! love the detail it adds, and the simplicity of it.
Thank you so much, Karah!
I’m in the process of painting my girl’s dresser and came across with your pin. Love the concept!! Thank you for sharing, will definitely try it out.
Thank you, Claudia! I hope you’re happy with your results!
what did you do to dresser to prepare it to paint.I’ve already bought my decals just love this look.what kind of paint did you use.decaling dresser and chest
I just sanded it, primed it, and painted it. I also topped it with a clear poly topcoat.
Good luck with your project!
so nice of color